Text Watermark in Photoshop: Readable Marks, Less Repetition
You need a © line, studio name, or URL on the image, and it has to stay legible on snow, sky, and shadow without stealing the frame. That is the job of a text watermark in Photoshop, and getting it wrong means either an invisible line or a caption that shouts over the photo.
This guide covers a manual text workflow on one image, then what changes when the same text watermark must run across many files without rebuilding layers every time. Watermark 3 fits that second case inside Photoshop; we get to it after the type-and-layer basics.
Text Watermark in Photoshop: What to Decide First
Before you type anything, decide what the line should say and how strong it needs to read.
Content is usually short: a © line with the year and name, a business name, or a website. Long sentences fight for attention with the photo, so most people keep text watermarks to one line, or two at most.
Contrast matters more than font choice. A thin gray font can disappear on busy textures. A bold white line can blow out on highlights. Plan to adjust opacity and sometimes add a stroke so the text stays readable at thumbnail size.
Placement is often a corner so the subject stays clear. Lower-right is common for English layouts, but pick the corner that avoids faces, horizons, or other focal points.
Add a Text Watermark in Photoshop Manually
For a single image, the built-in type workflow is enough.
- Open your photo in Photoshop.
- Select the Horizontal Type tool and click where you want the watermark to sit. Type your line.
- In the options bar or Character panel, set font, size, color, tracking, and anti-aliasing. For small web exports, slightly larger type often reads better than a tiny font that looks fine only at full resolution.
- Use Edit → Free Transform (or the Move tool with Show Transform Controls) to position and scale the text layer. Hold Shift while scaling if you want uniform proportions.
- Lower opacity in the Layers panel until the mark feels visible but not dominant. Many photographers land between roughly 30% and 60%, depending on background.
- Optional: open Layer → Layer Style → Stroke if you need a thin outline for readability on mixed backgrounds. Keep stroke weight modest so the watermark still looks like a mark, not a heavy caption.
This path is ideal when you care about one hero image, a tight set of finals, or a layout where you want to judge placement by eye.

A corner text watermark on a landscape, the kind of look you can build manually or speed up with Watermark 3.
Size, Opacity, and Readability for a Text Watermark
Size should track the output, not only the full-resolution canvas. Text that looks balanced at 6000 pixels wide may feel huge on a 1080px web export. Zoom out to thumbnail scale. If the line vanishes, it will not protect or brand the image in a feed.
Opacity interacts with color. A semi-transparent white line on a bright sky may need a higher opacity or a subtle stroke than the same line on shadow areas. Check both the brightest and darkest parts of the frame.
When you switch between landscape and portrait, the same pixel offset from the corner can feel different. Manual work gives control, but it also means you repeat those checks on every file.
When the Same Text Watermark Needs to Run Across Many Images
If you watermark event galleries, stock-style batches, or client deliveries, manual text layers on every file does not scale. You need consistent placement and scale relative to each image, not a fixed position that only fits one aspect ratio.
Watermark is a Photoshop plugin built for text and logo watermarks. After you install it, you choose Text as the source, enter your line, then set font, color, and optional stroke in one place. You adjust size, grid placement, and opacity without stacking the same layer operations by hand on each document.
When you are ready to apply that text watermark to many files at once, open the Images tab: set a source folder and target folder, choose whether to keep subfolders, then use Run Batch so every image gets the same text watermark settings.
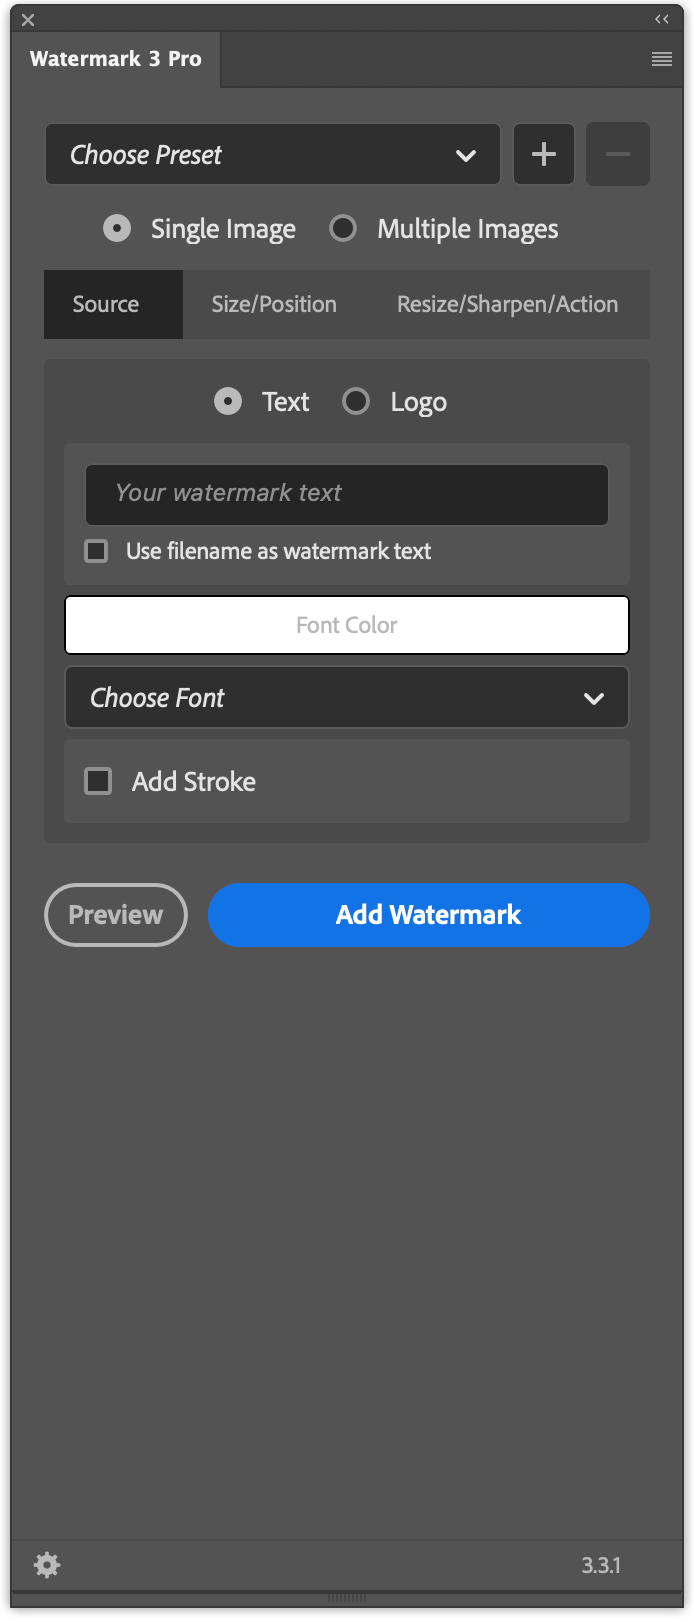
The Source tab in the plugin for typography and text-based watermarks.
The free version includes text and logo watermarks, three watermark sizes, stroke for text, and free positioning on single or multiple images. If you outgrow the basics, the Pro version adds options such as custom watermark size and pattern across the entire image, which helps when a single corner line is not enough for your use case.
Walkthrough of the free version of Watermark in Photoshop, starting with a text watermark on one image.
Conclusion
Adding a text watermark in Photoshop starts with clear copy, readable type, and placement that does not fight the subject. For one or a few images, manual text layers are enough. For repeat work with the same line across changing dimensions, a dedicated watermark workflow inside Photoshop saves time and keeps results consistent.
If you want text or logo watermarks with flexible placement and batch processing on Windows or Mac, see the details and download on the Watermark 3 Photoshop plugin page.