Add a Logo Watermark in Photoshop, Keep It Reusable
You keep dropping the same logo onto photo after photo, and rebuilding the stack for every crop and orientation gets old fast. Whether you use a monogram or a full lockup, you want one setup you can trust on a hero frame and again when the folder is deep.
This guide walks through preparing your logo, placing it manually in Photoshop, and tuning size and opacity. When the same mark needs to run across many files, Watermark 3 can carry that repeat work inside Photoshop so you are not nudging layers from scratch each time. The sections below start with manual layers, then expand to that workflow.
Prepare Your Logo File for a Photoshop Watermark
Most logo watermarks use a PNG with transparency so the mark floats over the image without a white box. If your brand file is only available as a flat JPG, ask your designer for an asset with an alpha channel, or export a PNG from your vector source.
Vector formats (AI, EPS, PDF, SVG) stay sharp when you scale. Photoshop can place many of these directly. If you prefer a raster workflow, export a high-resolution PNG at a size larger than you expect to need on screen. You can always scale down; scaling up softens edges.
Keep a master file you do not flatten over the photo. Work from a copy when you merge or rasterize, so you can adjust the logo later without hunting for the original.
Add a Logo Watermark in Photoshop Manually
For a single image, the manual path is straightforward.
- Open your photo in Photoshop.
- Use File → Place Embedded (or Place Linked if you manage logos from a shared folder) and select your logo file.
- Resize and position on the canvas, then confirm. Photoshop places the logo as a Smart Object by default in many setups, which helps if you need to tweak scale again later.
- Lower opacity in the Layers panel until the mark feels visible but not dominant. Many photographers land between roughly 20% and 50%, depending on background contrast.
- Optional: add a layer mask if you want the logo to fade more on one side, or use a drop shadow sparingly for readability on busy areas.
This workflow is ideal when you care about one hero image, a tight selection of finals, or a layout where you want to judge placement by eye.
A corner logo-style mark on a portrait, the kind of look you can build manually or speed up with Watermark 3.
Logo Watermark in Photoshop: Size, Placement, and Readability
Placement usually means a corner or edge so the subject stays clear. Lower-right is common for English viewers, but choose the corner that avoids faces, horizons, or other focal points.
Size should track the output, not only the full-resolution canvas. A logo that looks balanced at 4000 pixels wide may feel huge on a 1080px web export. When you prepare social or web versions, check the watermark at the size people will actually see.
Contrast matters more than absolute opacity. A light logo on a bright sky may need slightly higher opacity or a subtle stroke. A dark logo on shadow areas may need the opposite. Zoom out to thumbnail scale occasionally. If the mark disappears, it will not protect or brand the image in a feed.
When you switch between landscape and portrait, the same pixel offset from the corner can feel different. Manual work gives control, but it also means you repeat those judgments on every file.
When the Same Logo Watermark Needs to Run Across Many Images
If you watermark event galleries, stock-style batches, or client deliveries, manual placement on every file does not scale. You need consistent placement and scale relative to each image, not a fixed pixel position that only fits one aspect ratio.
Watermark is a Photoshop plugin built for text and logo watermarks. After you install it, you pick Logo as the source, choose your file, then adjust size, corner or grid placement, and opacity in one panel. The plugin is designed for this workflow first, so you spend less time nudging layers and more time on the photos themselves.
When you are ready to apply that logo to many files at once, open the Images tab: set a source folder and target folder, choose whether to keep subfolders, then use Run Batch so every image gets the same watermark settings.
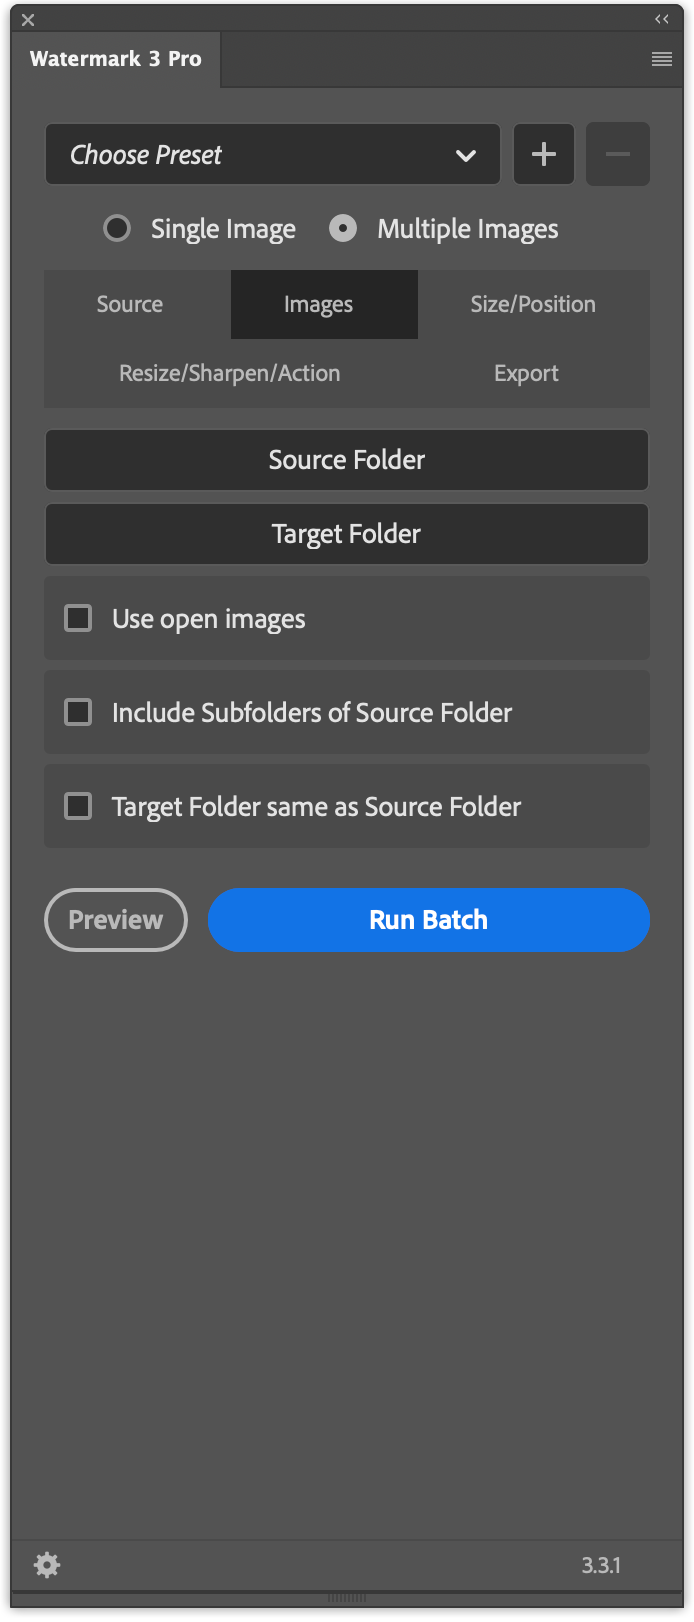
The Images tab in the plugin for batch watermarking folders of photos with your logo.
The free version includes text and logo watermarks, three watermark sizes, stroke for text, and free positioning on single or multiple images. If you outgrow the basics, the Pro version adds options such as custom watermark size, pattern across the entire image, and deeper batch export controls, which helps when one corner mark is not enough for your use case.
Walkthrough of the free version of Watermark in Photoshop, including a batch logo example.
Conclusion
Adding a logo watermark in Photoshop starts with a transparent or vector-ready asset, then placement, opacity, and readability at real viewing sizes. For one or a few images, manual layers are enough. For repeat work with the same branding, a dedicated watermark workflow inside Photoshop saves time and keeps results consistent.
If you want text or logo watermarks with flexible placement and batch processing on Windows or Mac, see the details and download on the Watermark 3 Photoshop plugin page.